Pages

Saturday, February 8, 2014

Texture Stripes with Essence

One of the big polish trends from last year was the textured polishes, and the brands like OPI and Zoya have come out with some great ones (I have yet to get my hands on a PixieDust polish, but hopefully this year I’ll manage to get one!). Unfortunately for me, these ones can be quite expensive over here, so thankfully, some of the more affordable brands are also coming out with their own textured polishes.


Today, I have done a simple striping tape mani, using two Essence polishes. The base here is Essence Boho Chic, a lovely soft coral with gold flakies. I applied two coats of this, topped with one coat of No 7 Stay Perfect topcoat for a quick dry. Then I applied 2-3 strips pf striping tape on my nails, and then painted over with 1 coat of Me & My Lover, one of Essence’s Sparkle Sand Effect polishes and quickly removed the tape. Me & My Lover is a lovely red with red and gold glitter, and dries to a textured finish. I left this with no topcoat, to leave this with its textured finish.


I like the contrast between the texture and the smooth stripes with this mani. Overall, I like the textured trend, and I'll definitely be expanding my textured polish collection!

Wednesday, February 5, 2014

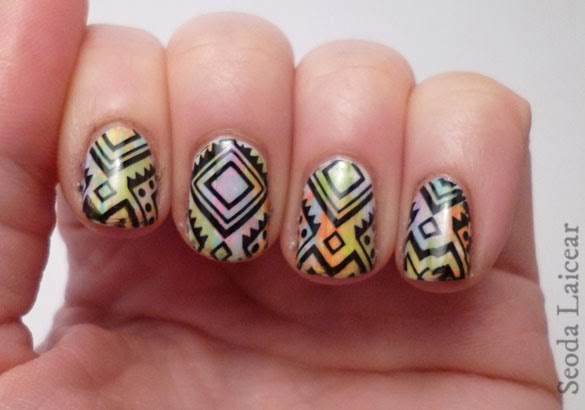
Grungy Tribal

I love checking out other nail art blogs, and seeing all the new techniques and ideas that the amazing bloggers are coming out with. I can struggle a lot with thinking up with unique ideas myself, so I find reading other blogs great for sparking inspiration and ideas. With today's mani, I decided to try out the Distressed Nail Art technique from one of my favourite blogs, the amazing Chalkboard Nails. I thought that this technique, done with some bright colours, would be a great base for a dark tribal design.


I started out with a white base of NYC Pinstripe White. Then, I followed Sarah's tutorial for her Distressed Nail Art, and painted the almost-dry polish brushes in stripes over the white (the tutorial explains this a lot better!), using Essence colours Wanna Be Your Sunshine (yellow), Upper Green Side (green) and Free Hugs (pink), Barry M's Gelly Nail Paint in Mango (orange), OPI You're Such A Budapest (purple) and NYC Blue.L.ita (blue) (also, what a strange name!). I then topped all of this with a coat of No 7 Stay Perfect Topcoat to quickly dry everything and to smooth it out a bit. I then stamped a great tribal design from MoYou London’s Explorer collection plate 11, using Essence's matte black stamping polish. A final coat of No7 Stay Perfect topped everything off and sealed it in.


In hindsight, I think I used too many colours when doing the distressed technique, I probably could have done with only using two or three colours at most (as Sarah also advises in the tutorial). A couple of my nails looked a bit muddy when I put the orange over the green, but once I put the stamp on and finished it up, I actually really liked the result. I'll definitely try this technique again with some other colours, and I'll remember to take a picture of that part before putting anything else over it the next time!

Monday, February 3, 2014

Maybelline Street Artist Topcoats Swatches

Nail polish-wise, I'm a complete sucker for glitters, and unique ones at that. Most of the fun, unique glitter polishes I see online are from indie brands, and unfortunately they can sometimes be hard for me to pick up (not having the money, and needing them shipped from another country, etc, etc). So, when I see a commercial brand branching away from the usual, and releasing something different, I'm usually all over that and spending more than I really should! 
I couldn’t help myself when I found the Maybelline Street Artist glitter topcoats in my local Boots, I couldn’t choose between the four they had, so I bought them all!

These are all clear based, glitter topcoats, consisting of different sized hexagons, as well as bar shaped glitters. Each had a good glitter payoff. I didn't have any trouble getting any of the larger glitters on my nails, apart from the white bars in White Splatter; the white bars in this one were a little longer than the bars in the other glitters, so I didn't get a lot of them in my swatch. Other than that, I didn’t have any trouble with these, and I’ll definitely wear them again.

 My swatches below are all 1 coat over their respective bases, and all topped off with 2 coats No7 Stay Perfect topcoat.

Alley Attitude – 1 coat over Essence Wanna Be Your Sunshine
Alley Attitude has small, medium, large black hexagons, small & medium blue hexagons, and blue bars in a clear base.


Urban Vibe – 1 coat  over Essence The Boy Next Door
Urban Vibe consists of small, medium, large black hexagons, small & medium orange hexagons, and orange bars in a clear base.


Boom Box Black – 1 coat over Essence Break Through
Boom Box Black has small, medium, large black hexagons, small & medium green hexagons, and green bars in a clear base. (Please excuse the mess on my index finger - I accidentally glooped the glitter polish on that one - oops! :) )


White Splatter – 1 coat over Zoya Kristen

White Splatter contains a slightly different glitter mix than the other three. There are small, medium, large white hexagons & white bars, small & medium purple hexagons, and medium blue/green hexagons.


Overall, I really like these glitters. They add a bit of fun to a plain creme if I don't have the time to be going all out with some nail art. I think my favourite combo here is Alley Attitude over Wanna Be Your Sunshine. I think the bright yellow base really makes the blue glitter stand out! I'll definitely wear these together again.


Thursday, January 30, 2014

Plaid Style with Colour Club Harlem Lights

I recently picked up my first bottles of Colour Club polish when I snuck into TK Maxx while in Dublin last week. I picked up the Harlem Lights collection, and immediately thought a plaid style design would go well with the cremes in this set. 


The base here is 2 coats Poetic Hues, a yellow toned nude, and I used my striper brush to paint on Lady Holiday (grey) and Baldwin Blues (blue). I topped this with two coats of Sally Hansen Insta-Dri topcoat.


The one thing I don't like about the Colour Club sets in TK Maxx is that the bottles don't come with names (I like when brands give their polishes proper names instead of numbers, so when they have neither, it's really annoying!), it would be nice if they even had a list on the back of the boxes or something. Nothing that’s not solved with a quick trip to Google Search though! :)
In any case, I really liked the three cremes of this set, and I'm looking forward to trying out the rest!

Ciao for now! x

Sunday, January 26, 2014

Blue Cross

One particular element of nail art that I feel I need a lot of practice with is striping, and getting used to using my long striping brushes. I also recently separated all of my unused polishes from the rest in my stash, and found that I had an awful lot more than I realised, so in today's mani I’m getting my stripey-stripe on while using up some unused polishes as well. I saw this criss-cross style design online in various different places, and thought it would be a good one to practice.


The base for this mani is Baby Blue from GOSH Cosmetics' Oh My Gosh range, and the crosses and stripes are China Glaze Turned Up Turquoise, painted with a striper brush.


It wasn't a bad effort, although I did mess up my index finger something awful! It was one of those rare manis that actually looked passable when I did the stripes on my right hand too, so it was a relative win-win all round!
Ciao for now! x

Friday, January 24, 2014

Girly Argyle

Howdy peeps! Today I've got a girly take on a jumper design – the Argyle sweater! I've been wanting to try this design out for a while, but just never got around to it until now. Also, I made a light box during my time-out, so this was my first time trying it out!


The base is Essence Free Hugs, and I used some squares of sticky tape and then painted on OPI Kiss Me On My Tulips to create the diamond effect. I used Barry M Silver Foil to finish off the silver stripes. Everything's topped off with a coat of Seche Vite. Nice design for some tape and striping practice!


I remember that I used to have a string top when I was about 17 with this design and colour scheme, and I loved it, and thought I looked the bee's knees when I wore it out! I think I’ll stick with wearing this on my nails from now on!

Ciao for now! x

Tuesday, January 21, 2014

Hello Again! (Plus, a catch up mani gallery)

*dusts off cobwebs*

Wow, it’s been a while since I’ve been in here! I’ve had real life get in the way of everything, and the blog has gotten a bit neglected. But now I have a lot more time to dedicate to it, so I’m looking forward to getting more of my manis up for all to see.

Even though this is my first post in months, I haven’t stopped painting my nails, and I’ve taken quick pics of a few over the last few months with my phone so I can keep track of my progress.
This is just a quick dust off to kickstart my posting again, but I thought I’d share some photos of the manis I’ve worn since I last posted (this post will be a bit picture heavy!). Hope you enjoy! J

(P.S. Please excuse the state of my hands in a lot of these – stress plus nervous habit do not a very nice pair of hands make!)

Harry Potter

Sherlock

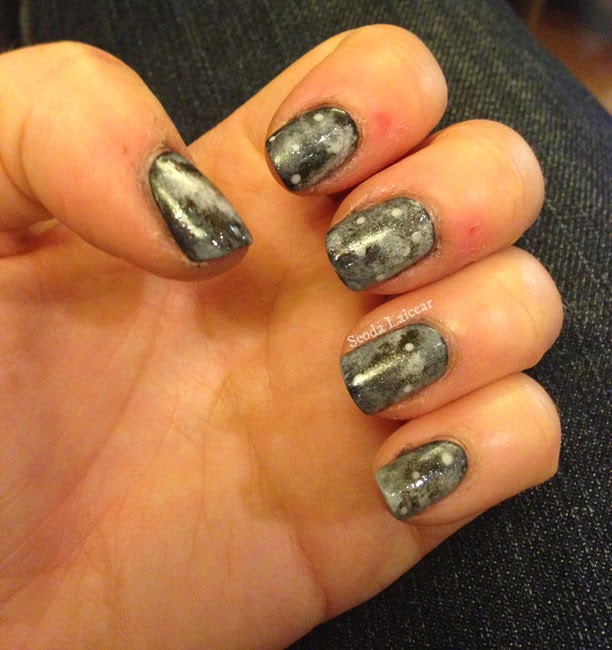
Monochrome Galaxy

Minions!

Loki

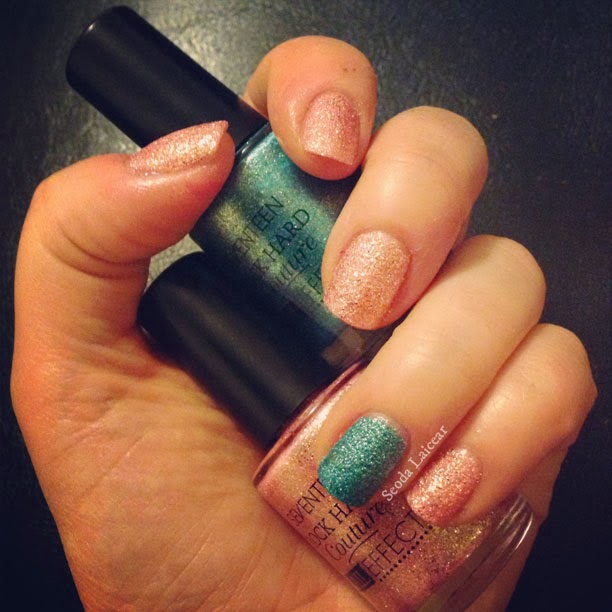
Seventeen Rock Hard Couture Effects Bijoux Baby and Cameo Crush

Floral stamp with Essence Break Through and Hello Marshmallow!

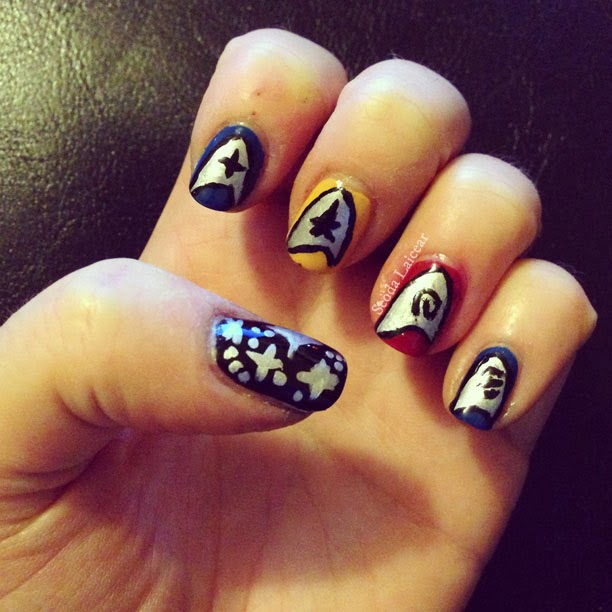
Star Trek

V-shaped tape mani with A-England Briar Rose and Rose Bower

Eevee-lutions, left hand

Eevee-lutions, right hand

Watchmen

Stripey-floral

Halloween Haunted house (my personal fave :) )

Sharks!

Butterfly wings


So, that's what I've been up to on my overly long blog hiatus. I have a couple of manis lined up for the next few days, so hopefully I'll be back to posting regularly from now on!

Ciao for now! x